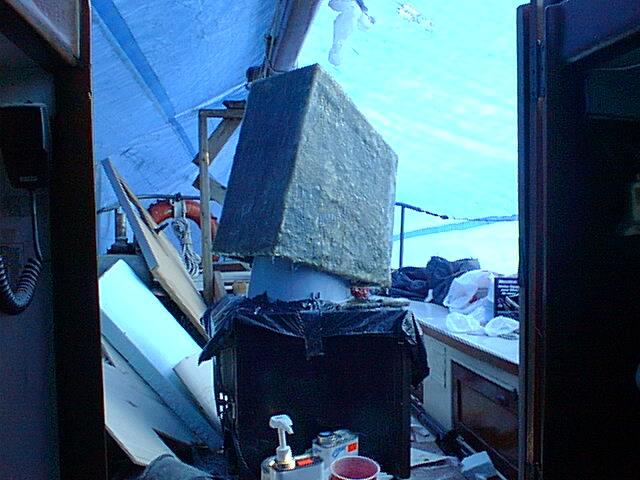
The new tank-in-progress is in the center. The tank is sitting upside-down here.
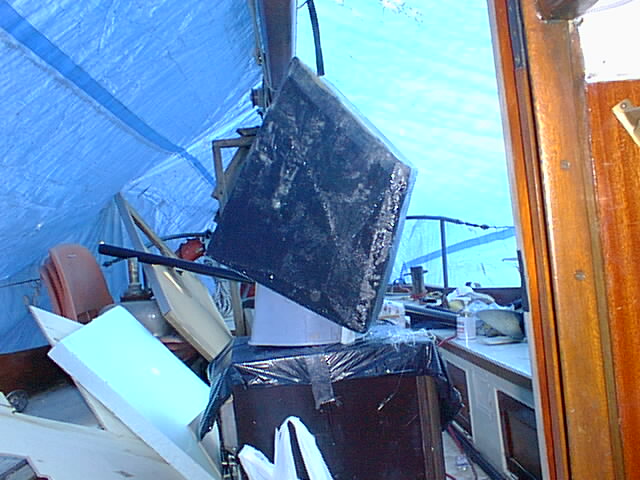
The tank with a few more layers of glass on it. The rest of the clutter is from a galley/icebox build that was also in progress.
Build a Head (Marine Toilet) Holding Tank
| Summary: Dave builds a new head holding tank out of fiberglass to fit an
unusually-shaped space aboard "Belle Argo", his Dickerson 32' Aft Cockpit ketch.
Step-by-step pointers and photos.
You may want to check out our Selected Books section under the DIY and Projects category for books covering boat projects and renovations that you can do yourself.
|
When I bought my previous boat, Belle Argo, a Dickerson 32 Aft cockpit ketch, it had a 50 liter head holding tank of the flexible bladder bag variety. That in itself isn't necessarily a bad thing, but it's location was far from ideal - it lived in one of the saloon's settee seat storage areas.
Settee storage compartments are prime storage areas because of their large volume and handy location. Also since the settee functions as the boat's dining room, it's also just about the least desired place for head/holding tank odours!
After a few seasons with it located there, I figured it was time for a change - the flexible bladder bag and/or the head hoses were starting to become permeated so the toilet smells were becoming more noticeable. Since it was time to renew the head tank and hoses anyway, it was a good time to relocate the tank as well.
There are a few things to consider with head holding tanks:
1. They need to be made of an impermeable material so that odours won't bleed through.
2. They need to be strong enough to resist collapsing when the head gets pumped out - there's a fair bit of suction applied!
3. The hose runs need to be as short as practically possible, and the hoses should be run to avoid having low spots so that there would not be any sewage left standing. Often it's the hoses that start to exude odour, so I would not skimp on them, but buy the best hoses the chandlery carried.
4. The tank's vent pipe and deck fitting should be as large as possible with as straight a run as possible; a well-vented holding tank is a non-stinky tank as it is the anaerobic bacteria that cause the smells.
5. If you are going to use a flexible bladder tank, make sure it is placed in such a way that the tank won't move and chafe while underway - you definitely don't want to spring a leak!
My first task was to see if there were a suitable spot to locate a new tank. I was hoping to employ a fixed, rigid tank as I always had trouble pumping out the flexible one - with it laying flat in the storage compartment, it tended to collapse and block the exit port when suction was applied to it. I often had to get hands-on with it while getting it pumped out.
I had noticed that there was some inaccessible space under the sink in the head that might be usable, and so decided to take the countertop off and take some measurements. It turned out that if I utilized all the available space there, I could get a tank of very nearly the same volume as the flexible tank, with shorter hose runs, and with the whole system contained in the head, freeing up the settee space.
Because of the odd angles required to fit a tank in that location, the plan was to build my own out of fiberglass. I would need to make a mold. It took quite a bit of fiddling with bits of plywood and small L-brackets since the space was tough to squeeze myself into, but I eventually came up with a decent mockup of the tank - a male plug, sized about 1/4" smaller on all sides than the final tank to allow for the thickness of the fiberglass.
The mold was to be covered completely with fiberglass on all sides except the top. The top would only have roughly a 1" lip initially. The rest of the top would be built separately, have the input/output pipe and vent through-hull fitting attached to it, and then be glued and glassed onto the tank.
In order to minimize hoses and holes through the top of the tank, I decided to fit a pipe that ran from the bottom of the tank and out the top, connected to a single hose that ran to a Y-valve. With the Y-valve set in position 1, the toilet would be connected to the tank so that flushing would send the effluent into the tank. With the Y-valve set in position 2, the deck pump-out fitting would be connected to the tank, allowing the sewage to be pumped out (thus the pipe running to the bottom of the tank).
The mold was prepared for covering in fiberglass by covering it tightly in plastic (garbage bag plastic, in fact, taped together where needed with plastic packing tape). The plastic would make for a smooth inner wall of the tank, and the fiberglass would free from it very easily after it had cured (I had tested the method before, so knew it would work). The way the mold was built also allowed for disassembly while still encased in fiberglass and the plywood removed through the opening at the top of the tank.
|
The new tank-in-progress is in the center. The tank is sitting upside-down here.
|
The tank with a few more layers of glass on it. The rest of the clutter is from a galley/icebox build that was also in progress. |
I started by applying gel-coat to the mold, and then used good quality glass cloth and West System epoxy to obtain a smooth inner wall, the best resistance to fluid absorption, and high strength. After a few layers of that, I switched to cheaper polyester resin and fiberglass matt, building it up until it was more than strong enough. After it cured, I disassembled the plywood of the mold (it was all held together with L-brackets and screws, so it was just a matter of unscrewing everything) and removed it.
I built the tank's lid in the same way, attached the input/output pipe and hose fitting and tank vent fitting, and glued it permanently in place with thickened epoxy resin followed up with a few layers of glass cloth laminated over the seam.
After everything had ample time to cure, I gave it a test (more to see how much it held than because of worries about leaks), and found that it did indeed hold water - about 52 liters.
Then it was just a matter of shoehorning it into the space under the head sink, fastening it down so it couldn't move, and attaching the hoses and Y-valve.
|
|
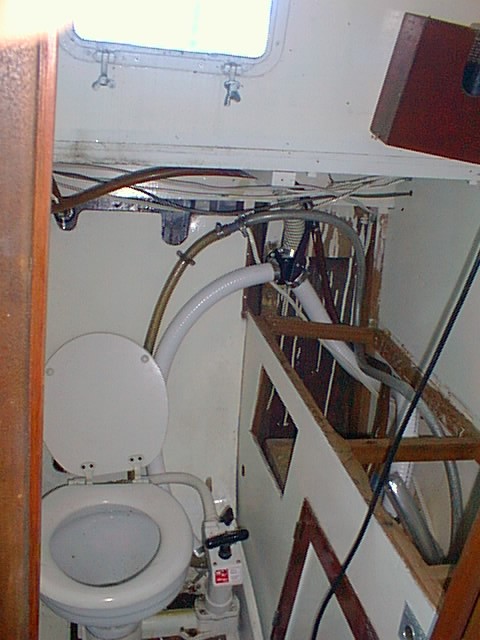
The smaller brown hose is the vent (larger would have been preferred but I didn't want to replace the deck fitting at the time). The white hose is the sewage input/output. |
|
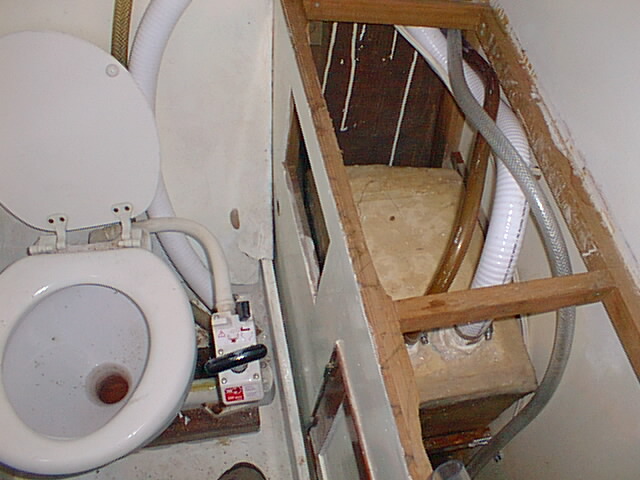
The Y-valve is the black thing with three hoses coming out of it. The two shiny hoses connect the toilet to the tank. In the other position, the tank hose and the vertical deck fitting hose are connected for pump-outs. |
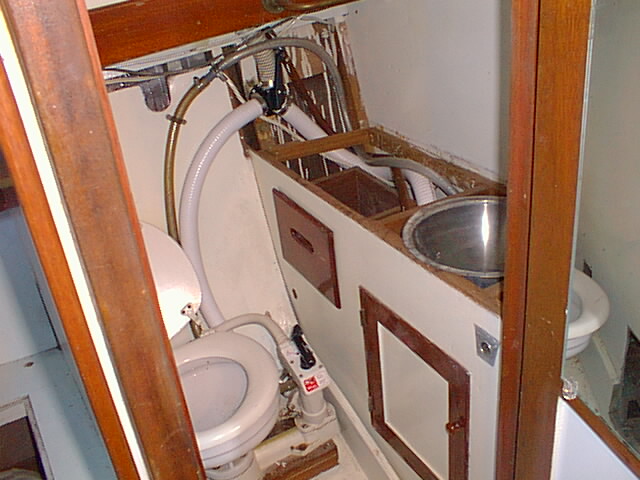
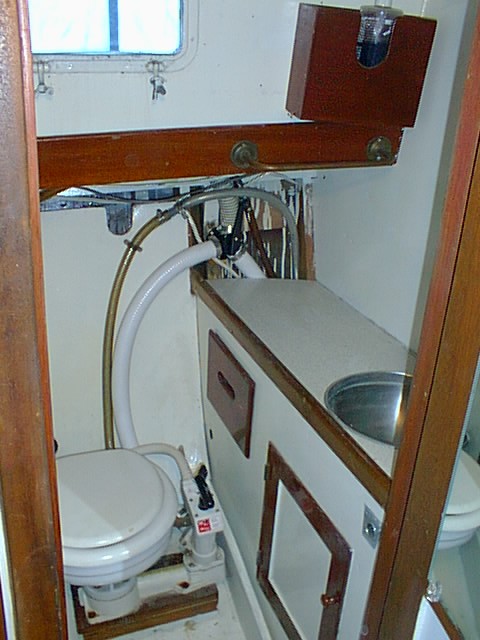
Almost back together again. |
It worked out just great, made use of otherwise wasted space, and freed up a lot of useful storage space.
If you have a suitable area, it's a lot quicker and not that much more expensive to buy a pre-fabricated plastic holding tank, but in an oddly shaped area like that on the Belle Argo, it would have been next to impossible to get one "off-the-shelf" that would fit.
I think it was well worth the effort.
© Copyright 2008
David S. Malar and Angelika Jardine. All rights reserved.
Home -
www.selfmadesailor.com
Website Design and SEO (Search Engine Optimization) by VentureIT.ca